Showing posts with label Desserts. Show all posts

Sunday, October 27, 2013

Pumpkin Ricotta Parfaits


Serves: 8

Recipe Level: Easy

I got this recipe from my boyfriend's mother and made a few small additions. It is a great update to traditional pumpkin pie and can be dressed up for entertaining. I know it sounds like a weird combination, but the savory flavor and creamy texture of the ricotta pair perfectly with the sweetness of the pumpkin custard. A traditional piece of pumpkin pie is about 325 calories (without any whipped cream on it). This recipe cuts 100 calories and 20 grams of carbs, and more than doubles the protein. There aren't a lot of desserts out there that pack in 12 grams of protein per serving, so this one will actually fill you up and you won't feel the desire to eat half a pie!

Pumpkin - 2 cups roasted & pureed or 1 can
Fat Free Evaporated Milk - 1 can
Truvia Baking Blend - 1/2 cup (if substituting sugar or Splenda, use 1 cup)
Eggs - 2 whole
Pumpkin Pie Spice - 1 1/2 tbsp.
Vanilla - 1 tsp.
Low Fat Ricotta - 2 cups 
Cinnamon Roasted Almonds - 2 oz. (about 40-50 nuts)

1. Preheat oven to 375 degrees. 

2. I hate doing extra dishes, so I mix this up in the same dish in which I bake it. In a deep casserole dish, mix together pumpkin, evaporated milk, Truvia, and pumpkin pie spice. I crack the eggs into the evaporated milk can and beat them up with the vanilla to avoid dirtying another bowl. (Did I mention I really hate doing dishes?) Then combine the eggs into the pumpkin mixture, making sure everything is well mixed.


3. Place in the oven and bake for 45 minutes or until it is completely cooked through and the center is set.

4. Remove from the oven and let cool.

5. To create the parfaits, use a clear class. (I used wine glasses, but any kind will work, you just want to be able to see the layers.) I did a more rustic interpretation, just layering them in with a spoon, if you wanted a cleaner presentation, you could use a piping bag or a zip top bag with the corner cut off and pipe each layer in. Start with a layer of ricotta, then ad a layer of pumpkin, then a layer of ricotta, then pumpkin and so on. You want about a 1/4 cup of ricotta and 1/8th of the pumpkin mixture in each parfait.

6. Top the parfaits with cinnamon almonds. You can buy them or make your own by taking raw almonds, tossing them in agave and cinnamon and roasting in the oven at 400 degrees for about 10-15 minutes. 


Nutrition Information per serving from Myfitnesspal.com
Pumpkin Ricotta Parfaits - 225 Calories, 11g. fat, 25g. carbs, 12g. protein

Wednesday, July 31, 2013

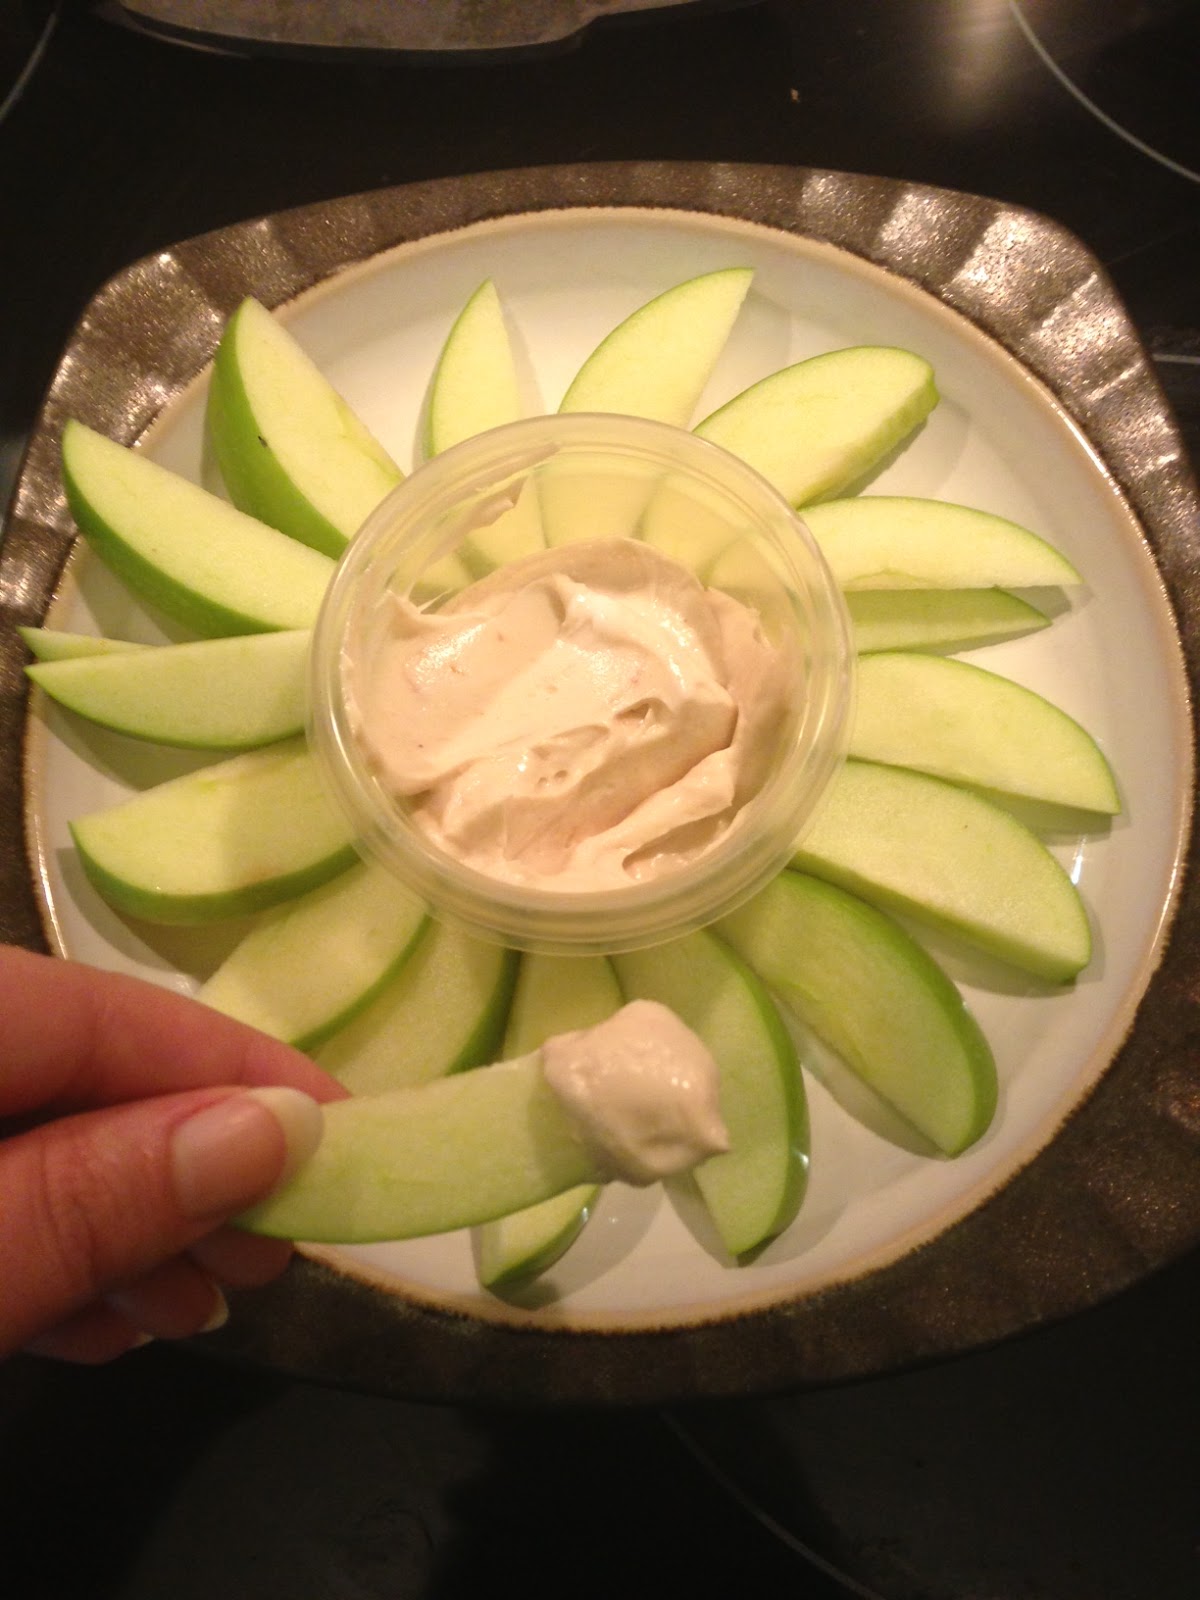
Peanut Butter Yogurt Dip


Serves 2

Recipe Level: Super Easy

It is crazy to think these three little ingredients can make something so yummy. This is one of those cases where the whole is greater than the sum of its parts. I know this recipe might sound a little too easy. But it really is a game changer. It takes an apple from eh to OMG. I feel like I am indulging in some sinful treat every time I eat it. So I encourage you to give it a try and feel free to change it up and let me know how it goes. Oh and kids will love this healthy treat! Just make sure there are no peanut allergies.

Fat Free Greek Yogurt - 1 serving (6 oz.) vanilla or plain
Natural Peanut Butter - 2 tbsp.
Stevia - 1 packet or to taste

1. Mix up all the ingredients in a small bowl.

2. This makes two portions (because I like to eat a lot of it) but it could probably go a little further. I portion it out into little dressing cups with the lids and keep them in the fridge so I can grab them on the go.


I usually eat this with apples but it would be good on just about anything (celery, carrots, crackers, pretzels, you name it). Another great option is to slather between to slices of banana and freeze for a yummy frozen treat.

Nutrition Information per serving from Myfitnesspal.com
Peanut Butter Yogurt Dip - 150 Calories, 8g. fat, 11g. carbs, 11g. protein

Monday, July 22, 2013

Joyful Almond Bites


Serves 12

Recipe Level: Easy


I went back and forth on putting the word vegan in the title of this recipe. I didn't want to scare anyone off thinking these little bites are anything but chocolately coconutty goodness. VEGAN CAN BE YUMMY TOO!!! These are also gluten-free and paleo friendly so everyone can enjoy these little treasures.

Coconut Oil - 1/3rd cup
Creamy Almond Butter - 1/3rd cup
Truvia Baking Blend - 2 tbsp. or 1/4 cup Agave Nectar (for paleo)
Vanilla Extract - 1/2 tsp.
Cocoa Powder - 1/3rd cup
Shredded Coconut - 4 tbsp.
Slivered Almonds - 4 tbsp.
Kosher or Sea Salt - sprinkle

1. Mix coconut oil, almond butter, Truvia or Agave, vanilla extract, and cocoa powder in a blender. Mix for a couple minute or until the mixture comes together and is very smooth. Let the mixture sit for a few minutes so the air bubbles will rise to the surface.

2. While your mixture is setting, take a little over half your almonds and coconut and add to the bottom of a silicon mini-muffin tin or a regular mini-muffin tin lined with cupcake wrappers.

3. Pour your chocolate mixture over the coconut and almonds trying to get even amounts in each cup.


4. Take a toothpick or small knife and run it through the mixture in each cup to make sure it coats the coconut and almonds on the bottom and to ensure all the air bubbles are out.

5. Take the reserved almonds and coconut and sprinkle a little on the top of each chocolate cup. Then add a little sprinkle of salt to the top of each too. A little dab will do you here, you don't want too much salt, but a little brings out the cocoa flavor.

6. You can place in the fridge or freezer depending on how patient you are to let them set. They are usually good to go after 10 minutes in the freezer or 30 minutes in the fridge. You will need to keep them refrigerated or frozen because the coconut butter melts just above room temperate. I usually just leave them in the freezer because I love when they are nice and frosty.

Enjoy!

Nutrition Information per serving from Myfitnesspal.com
Joyful Almond Bites - 132 Calories, 12g. fat, 5g. carbs, 2g. protein

Chocolate Chip Banana Oat Cookies


Serves 12

Recipe Level: Easy


This is my go to recipe anytime I have old bananas that I need to use up. You want to make sure your bananas are nice and ripe with lots of spots so they will mash up and become these yummy cookies. These cookies are also very versatile. You can easily make them vegan and gluten-free friendly so everyone can enjoy them. And they clock in at only 70 calories each and provide fiber and protein to keep you full. When was the last time a cookie was so good to you?

Banana - 1 medium to large ripe 
Peanut Butter - 2 tbsp.
Apple Sauce - 1/3rd cup
Vanilla Protein Powder - 1 scoop low carb.
Vanilla Extract - 1 tsp.
Old Fashioned Oats - 3/4 cup
Chocolate or Carob Chips - 3 tbsp.

1. Preheat oven to 350 degrees.

2. In a mixing bowl combine mashed banana, peanut butter, apple sauce and vanilla.

3. Stir in the protein powder. If you are making vegan cookies make sure to use a soy based protein powder or one that does not include any milk products.

4. Add in the old fashioned oats. If you are making this gluten-free make sure you are using gluten-free oats. 

5. Line a baking sheet with a silicon baking pad. This dough is relatively loose and has a tendency to stick if you don't use the silicon. 

6. Portion out the dough in 1 inch balls/globs on the silicon sheet. Like I said, the dough is pretty loose so it isn't going to look perfect. 

7. Add a few chocolate chips to the top of each cookie and press them in. It is easier to stretch the chocolate chips if you add them to the top of each cookie rather than mixing it into the dough. You want them to be the same thickness in the middle so they bake evenly. Don't be afraid to press them down a bit.

8. Bake for 20 minutes. These are great warm right out of the oven or room temperature. They stay nice and soft and will keep for a couple days.


Nutrition Information per serving from Myfitnesspal.com
Chocolate Chip Banana Cookies - 70 Calories, 3g. fat, 9g. carbs, 4g. protein

Sunday, June 30, 2013

Gluten Free Peanut Butter Cookies


Serves 14

Recipe Level: Easy

The original recipe for this came from my sister Laura. I have also seen several variations online. I made a few adjustments to take out some additional calories too. But trust me you will never miss the flour in the cookies and they could not be easier to make. They have become a hit with anyone whom I've shared the recipe with.

Peanut Butter - 1 cup all natural
Truvia Baking Blend - 1/4 cup
Brown Sugar - 1/2 cup
Egg - 1 whole
Vanilla - 1 tsp.
Kosher or Sea Salt - 1/4 tsp.

1. Preheat oven to 375 degrees.


2. Measure peanut butter, truvia, sugar and vanilla into a mixing bowl. I like to use chunky peanut butter for a little texture but any kind will work. Mix for one to two minutes with a hand mixer. The batter will be quite thick, so once it comes together, scrape down the sides of the bowl. You could also stir in chocolate chips or chopped nuts at this point too.

3. With clean hands portion the batter into one inch balls and place on a baking sheet.

4. Press each ball down with a fork in a cross hatch pattern that is traditional for peanut butter cookies.


5. Sprinkle the tops of each cookie with just a pinch of coarse sea salt or kosher salt.

6. Put cookies in the oven and bake for 10 minutes. Then enjoy warm or at room temperature.


Nutrition Information Provided by Myfitnesspal.com
Gluten-Free Peanut Butter Cookies - 146 calories, 10g. fat , 14g. carbs, 4 g. protein

Thursday, June 20, 2013

Vanilla Cupcakes with Almond Buttercream Frosting


Serves 12

Recipe Level: Medium


This recipe came out of trying to replicate the best cupcake I've ever had. There is a little bakery here in Oklahoma City that had an amazing vanilla cupcake with almond frosting. And let's be honest, it's really about the frosting. For Josh's birthday I tried to replicate that flavor but lighten it up again. It is still a splurge but maybe not a through the whole day off kind of calorie splurge.

The you can find the original recipe for vanilla cupcakes here. I lightened them up first by cutting the recipe in half. I definitely don't need two dozen cup cakes around no matter whose birthday it is. I also swapped out the sugar for Truvia Baking blend (this is half regular sugar and half stevia). I really like the baking blend because since it still includes some sugar it doesn't affect the texture too much. I also swapped out the whole milk for skim milk to cut out some of the fat. In the frosting, I made several changes since I was going for almond buttercream anyway. I cut down on the sugar since I find many frostings overly sweet anyway and I swapped out some of the butter for reduced-fat cream cheese and whipped topping. All in all I shaved over 100 calories, 20 grams of sugar and 4 grams of fat from each cupcake.

Vanilla Cupcakes:

Butter - 1 stick unsalted at room temperature
Truvia Baking Blend - 1/2 cup
Eggs - Two whole large at room temperature
Vanilla Extract - 1 tsp.
Skim Milk - 1/2 cup at room temperature
Flour - 1 1/3 cup all purpose
Baking Soda - 1/4 tsp.
Baking Powder - 1/2 tsp.
Kosher Salt - 1/4 tsp.

1. Get butter, eggs, cream cheese and milk out of the refrigerator about 30 minutes ahead so they can come up to room temperature before you mix them.

2. Preheat oven to 350 degrees. And line a muffin tin with cupcake wrappers.

3. In a small bowl sift together the flour, baking soda and baking powder and add salt. Set aside.

4. With a stand mixer or handheld mixer, cream together one stick of butter and 1/2 cup Truvia baking blend. Then add in eggs one at a time, then vanilla and milk.

5. Slowly add the dry ingredients to the wet ingredients mixing about a third of the dry in at a time.

6. Once the batter has come together, spoon into lined muffin tins. I like to use an icecream scoop for this. You want to fill them about 3/4 full. You can make 12 standard cupcakes or 6 jumbo depending on what pans you have on hand.

7. Bake for 25 minutes at 350 degrees.

Almond Buttercream Frosting:

Butter - 2/3 stick unsalted at room temperature
Powdered Sugar - 1 cup
Light Cream Cheese - 4 oz. 1/3rd less fat at room temperature
Almond Extract - 2 tsp.
Light Whipped Topping - 6 tbsp.

I don't usually start my frosting until the cupcakes our out of the oven because the cupcakes need time to cool before you frost them. If you want to start the frosting while the cupcakes are baking, you can just place it in the fridge while you are waiting for the cupcakes to cool.

1. With your hand mixer cream together the butter, powdered sugar and light cream cheese. Once it starts to come together add the almond extract and mix a little more. You don't want to over mix though.

2. Fold in the light whipped cream topping into the frosting mix. This will give the frosting a light and airy quality. If you wanted to use real whipping cream and make your own you could as well. But this is the quick, easy and light version.


3. Transfer the frosting into a piping bag if you have one. If not, a quart size ziplock bag will work just fine. I put the bag in a large cup and fold the edges over (like in the photo above) to make it easier to transfer the frosting. Once the frosting is in the bag, snip about a 1/2 inch off one corner.

4. Frost the cupcakes from the outside in, making smaller and smaller circles as you pipe around the cupcake. I topped mine with some slivered almonds for a little crunch and a fresh cherry for some color.


Nutrition Information per serving from Myfitnesspal.com
Vanilla Cupcakes with Almond Buttercream Frosting - 261 Calories, 16g. fat, 26g. carbs, 4g. protein

Monday, June 3, 2013

Berry Crumble


Serves - 2

Recipe Level: Easy

This is one of my favorite Summer desserts. You could substitute raspberries, blackberries, cherries or whatever you have on hand or is in season. It is a lightened up version of similar recipes I have found for crisps and crumbles. I lightened it up mostly by swapping out the sugar for Truvia and significantly cut down the amount of butter and added in nuts for their healthy fat and some texture. But trust me, it will still satisfy your sweet tooth.

Filling:
Strawberries - 6 medium frozen or raw
Blueberries - 1/2 cup frozen or raw
Truvia Baking Blend - 2 tsp
Corn Starch - 1 T
Lemon Juice - 1 tsp.

Crumble:
Old Fashioned Oatmeal - 3 T Dry
Wheat flour - 2 T
Butter - Unsalted, room-temperature 1 T
Slivered Almonds, 2 T.
Cinnamon - 1 tsp
Truvia Baking Blend - 4 tsp

1. Preheat oven to to 400 degrees.

2. In a large bowl mix together filling ingredients and mix so that cornstarch is coating all the fruit. Then spoon into two individual baking ramekins, splitting the berries evenly between the two. I love individual sized desserts because they have built-in portion control. They are relatively affordable so I suggest purchasing a set. Here is a link to a set like mine.


3. In another bowl (or in the same bowl once you've removed the berries and rinsed out) combine the crumble ingredients. You will need to mix in the butter with your fingers, so make sure you have clean hands then go to work. You want to crumble to slightly ball together in your hands, but since the butter has been significantly cut back in this recipe, it is still going to be a little crumbly, hence the name of the recipe.


4. Once you have the crumble combined spoon on top of the berries in the individual ramekins. Place the ramekins onto a baking sheet (sometimes the berries bubble over and can make a mess in the oven so this is just to prevent that).  Place the baking sheet with the ramekins into the preheated oven for 35 minutes.


5. Serve all on their own or with whipped cream, ice cream, greek yogurt, whatever your favorite topping is.


Nutrition Information per serving from Myfitnesspal.com
Berry Crumble  - 217 calories, 10g. fat, 28g. carbs, 4g protein